Create and test your first assessment
Set a short writing task, then try it yourself as a student before anyone else sees it. You will learn how the settings shape what students see and try the editor they write in.
The worked example is a Year 9 persuasive essay for 9B English.
Inktrail saves every change as you type, so you can stop and come back at any time. Nothing you do here is visible to students until you choose to share the assessment.
1. Start a new assessment
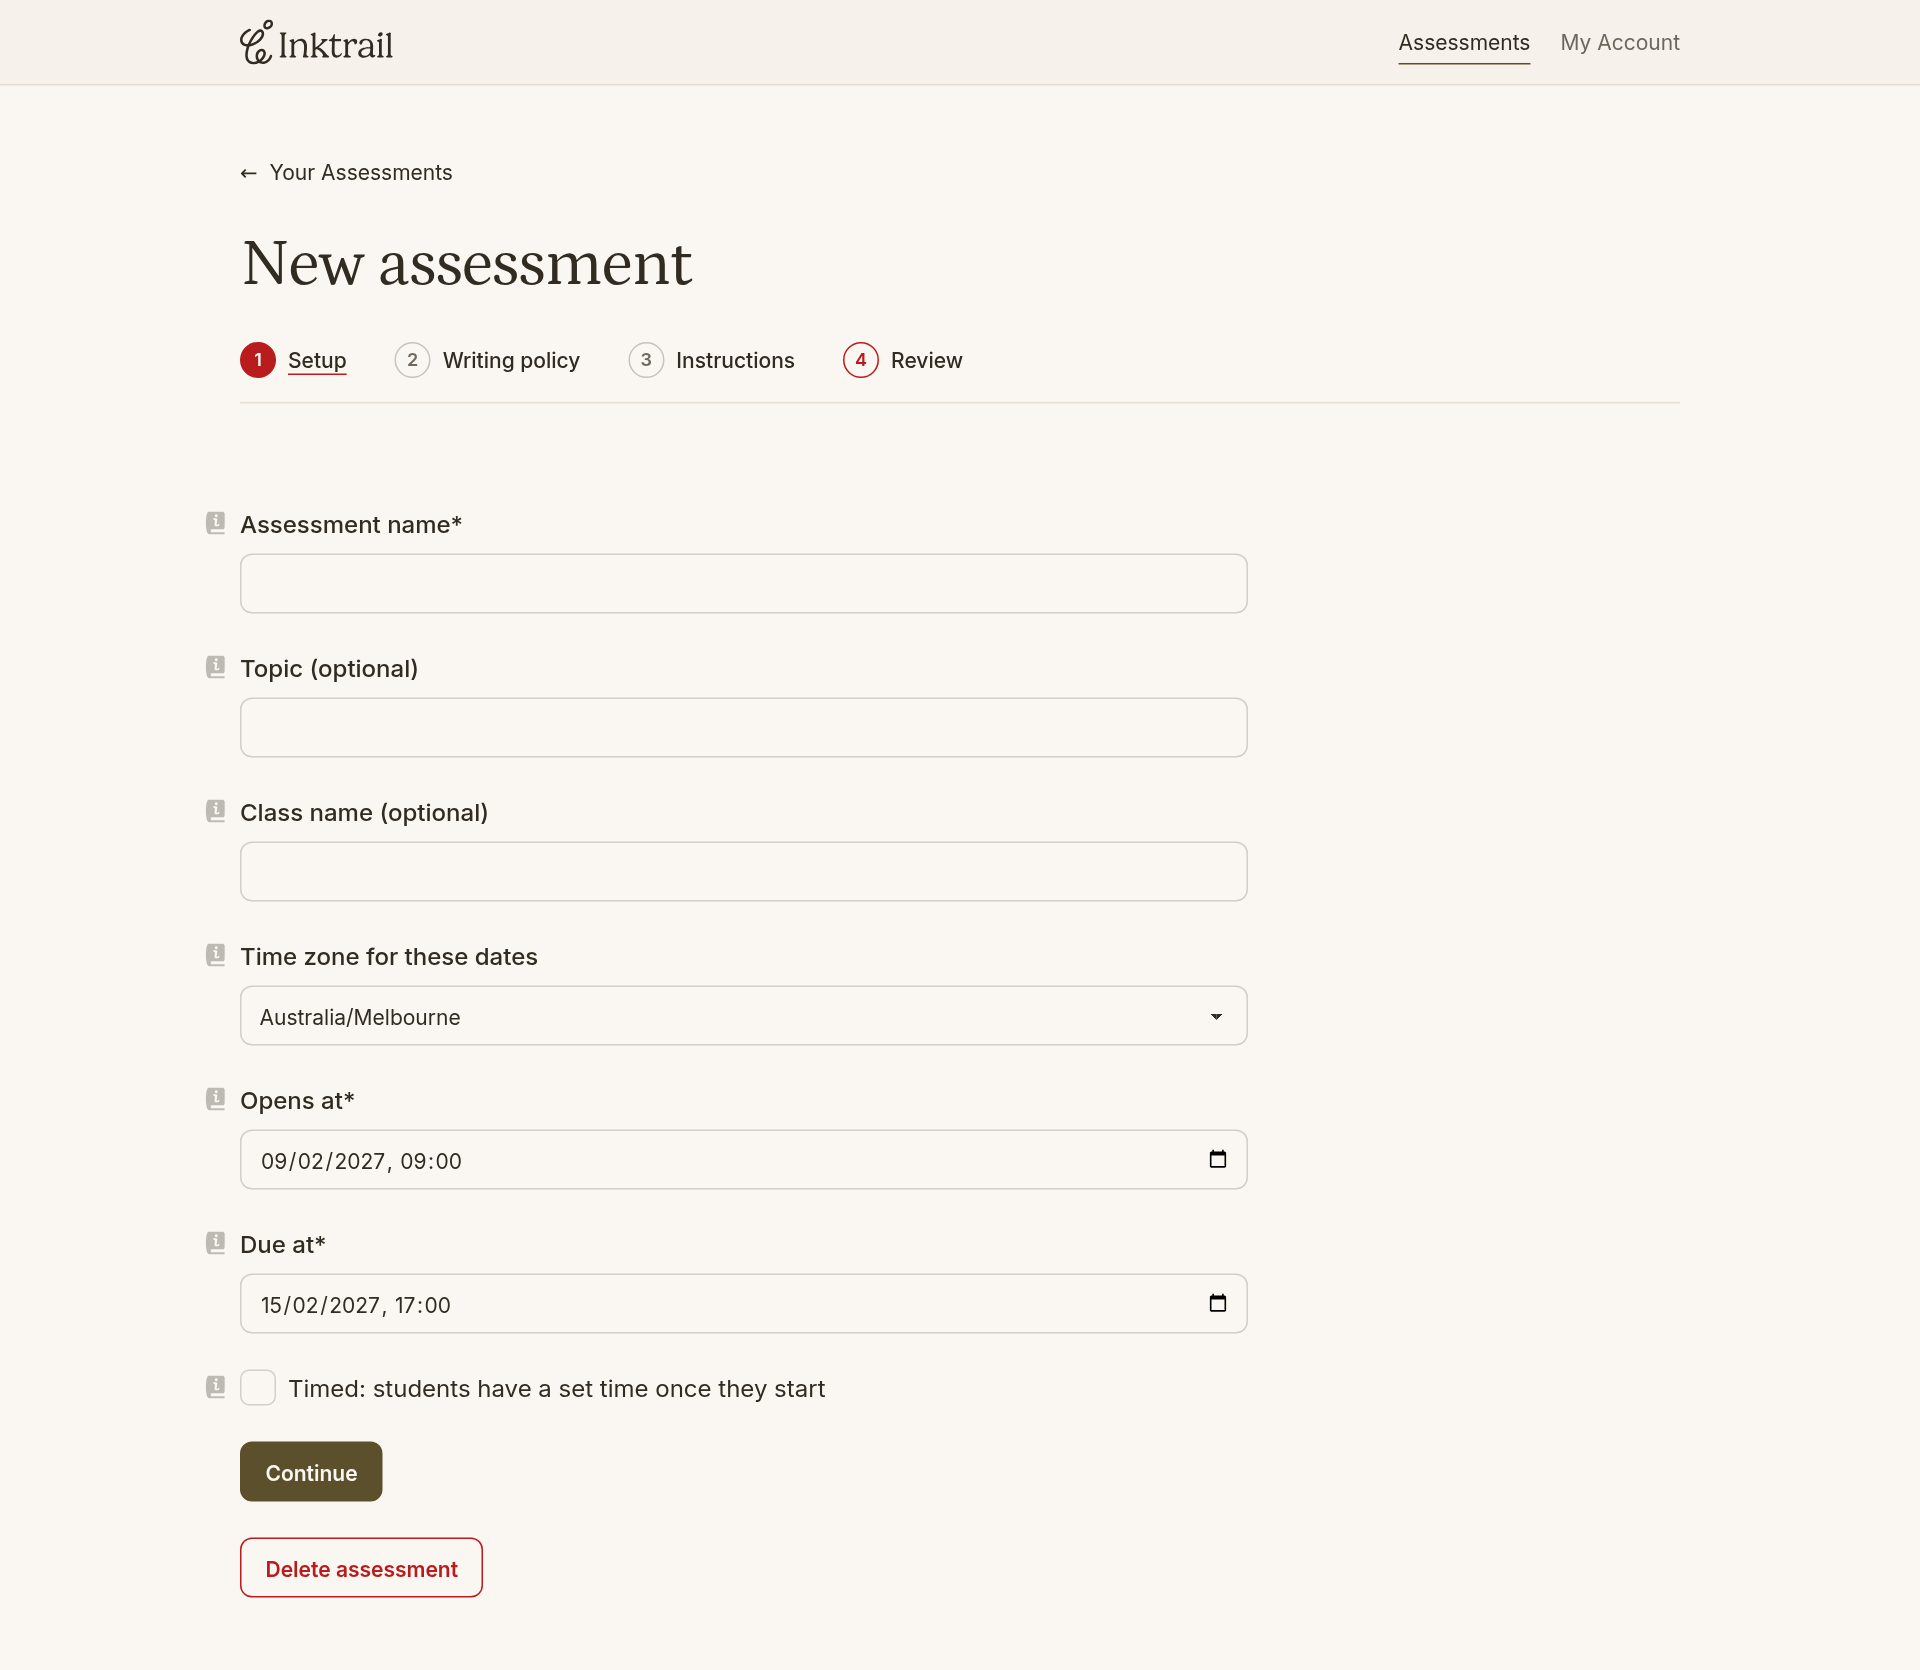
On Your Assessments, select New Assessment, then choose Untimed written assessment.
Untimed means students write at their own pace until the due date. For a timed exam, choose a timed assessment to give each student a set number of minutes once they start.
2. Name the assessment
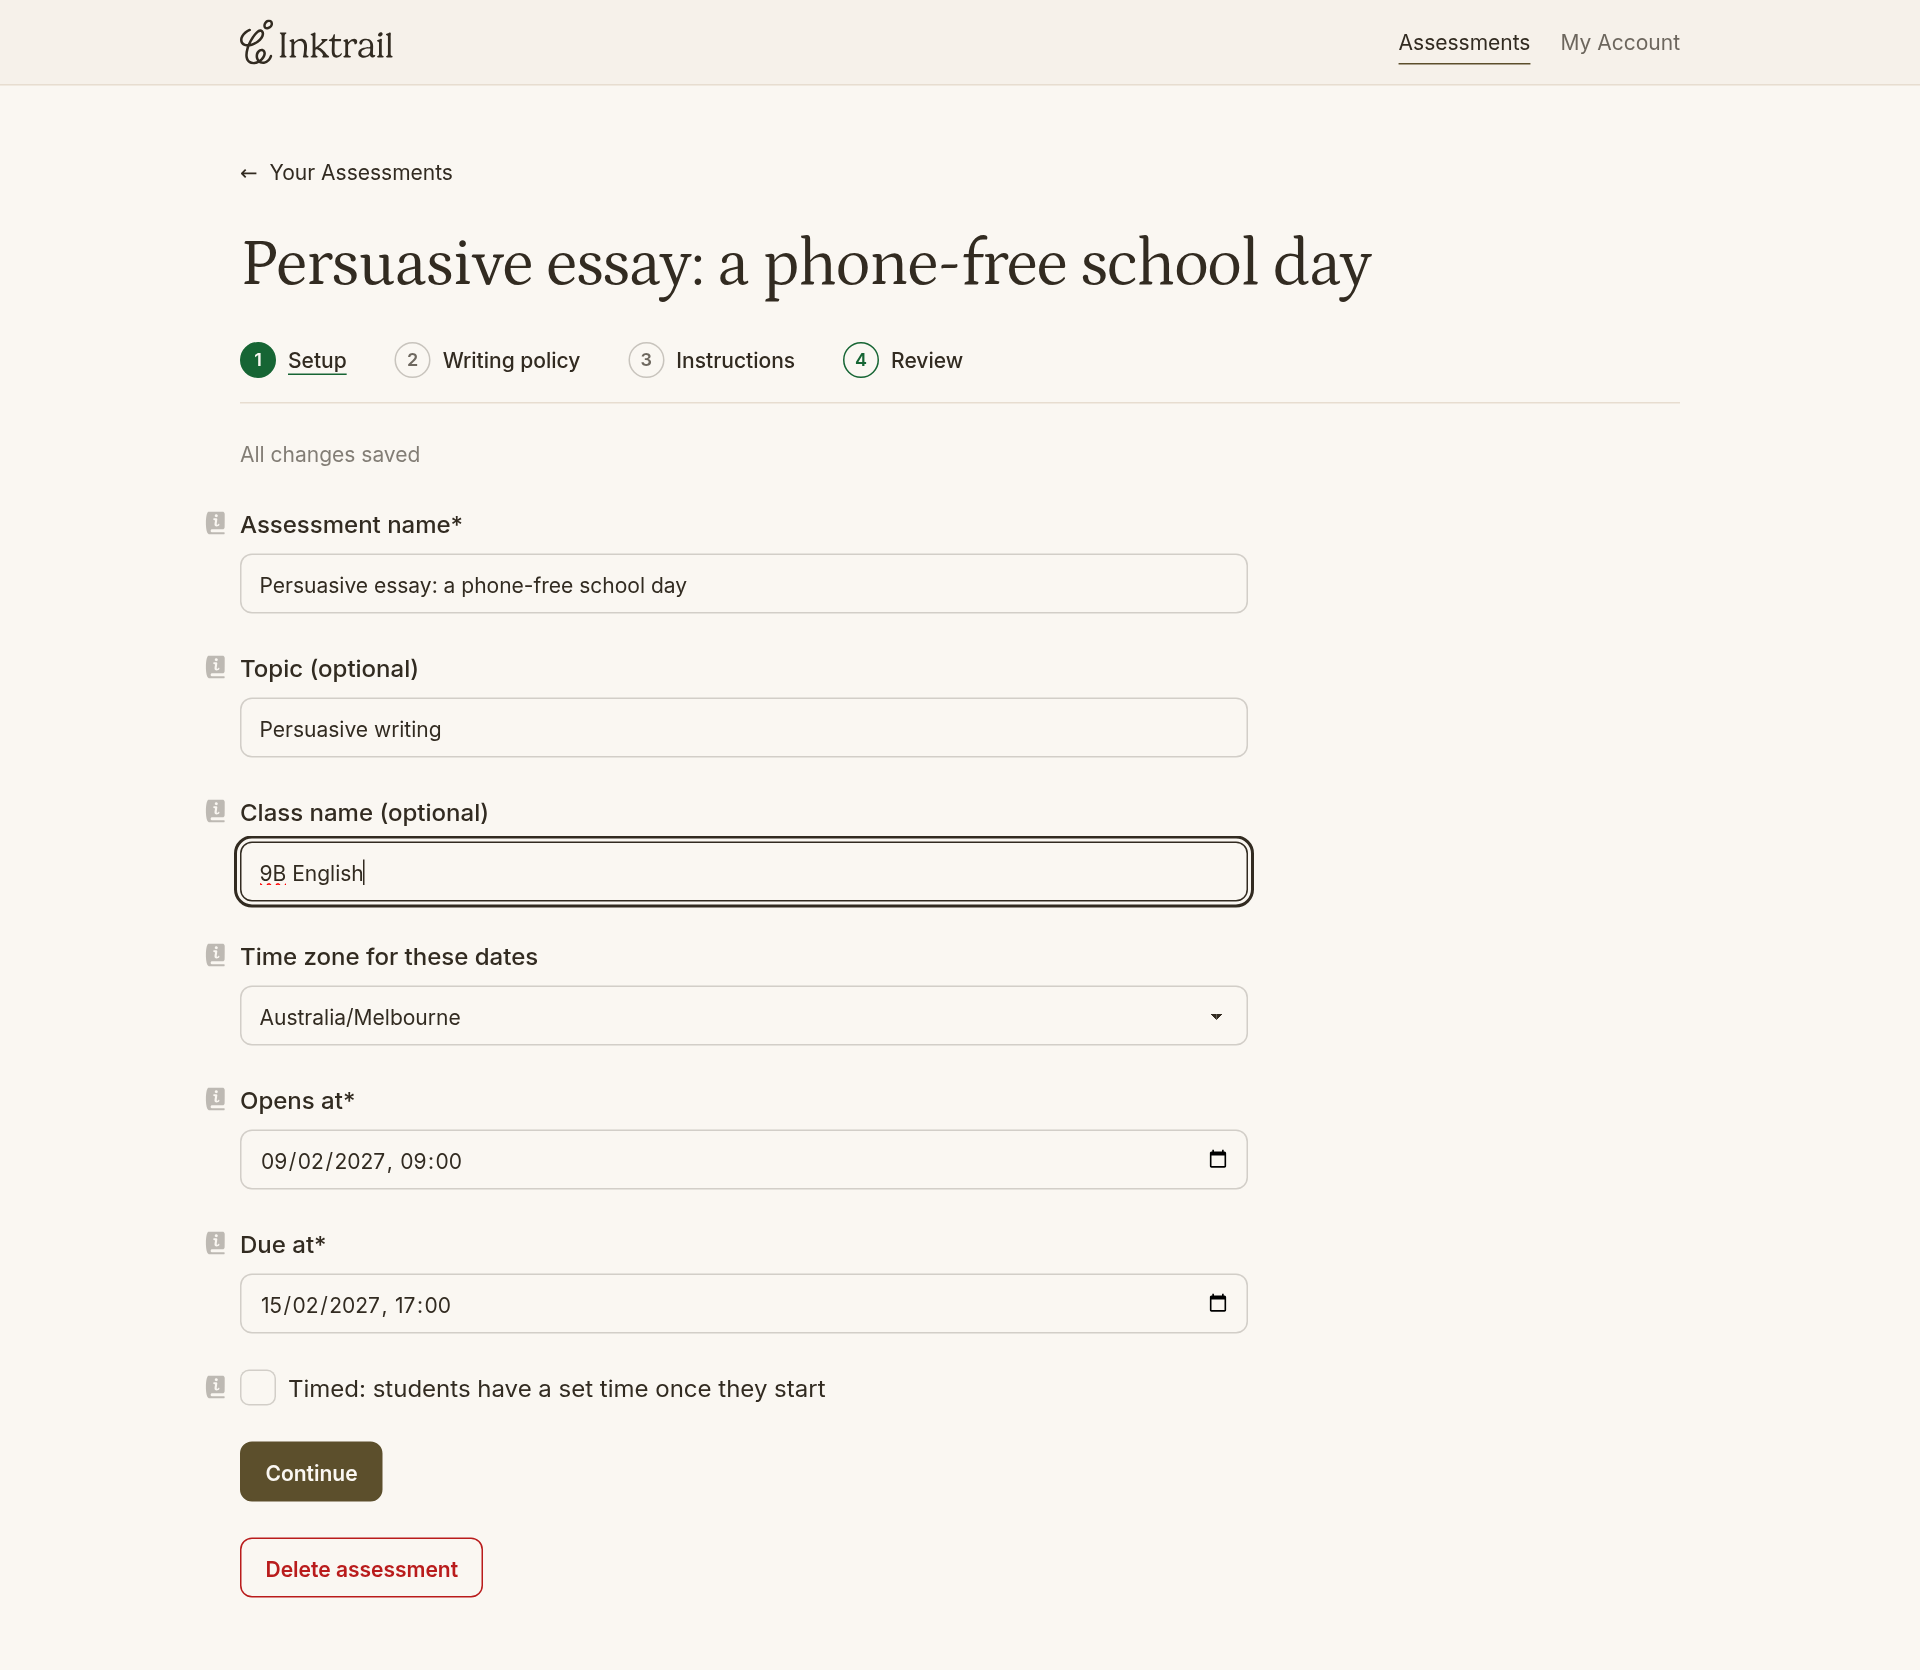
Give the task an Assessment name students will recognise in their list of works and at the top of their work. Topic and Class name are optional: they appear under the name and help you and your students tell apart similar assessments, or one assessment set for several classes. For example:
- Assessment name:
Persuasive essay: a phone-free school day - Topic:
Persuasive writing - Class name:
9B English
When the line above the form shows All changes saved, your draft is stored.
3. Choose when it opens
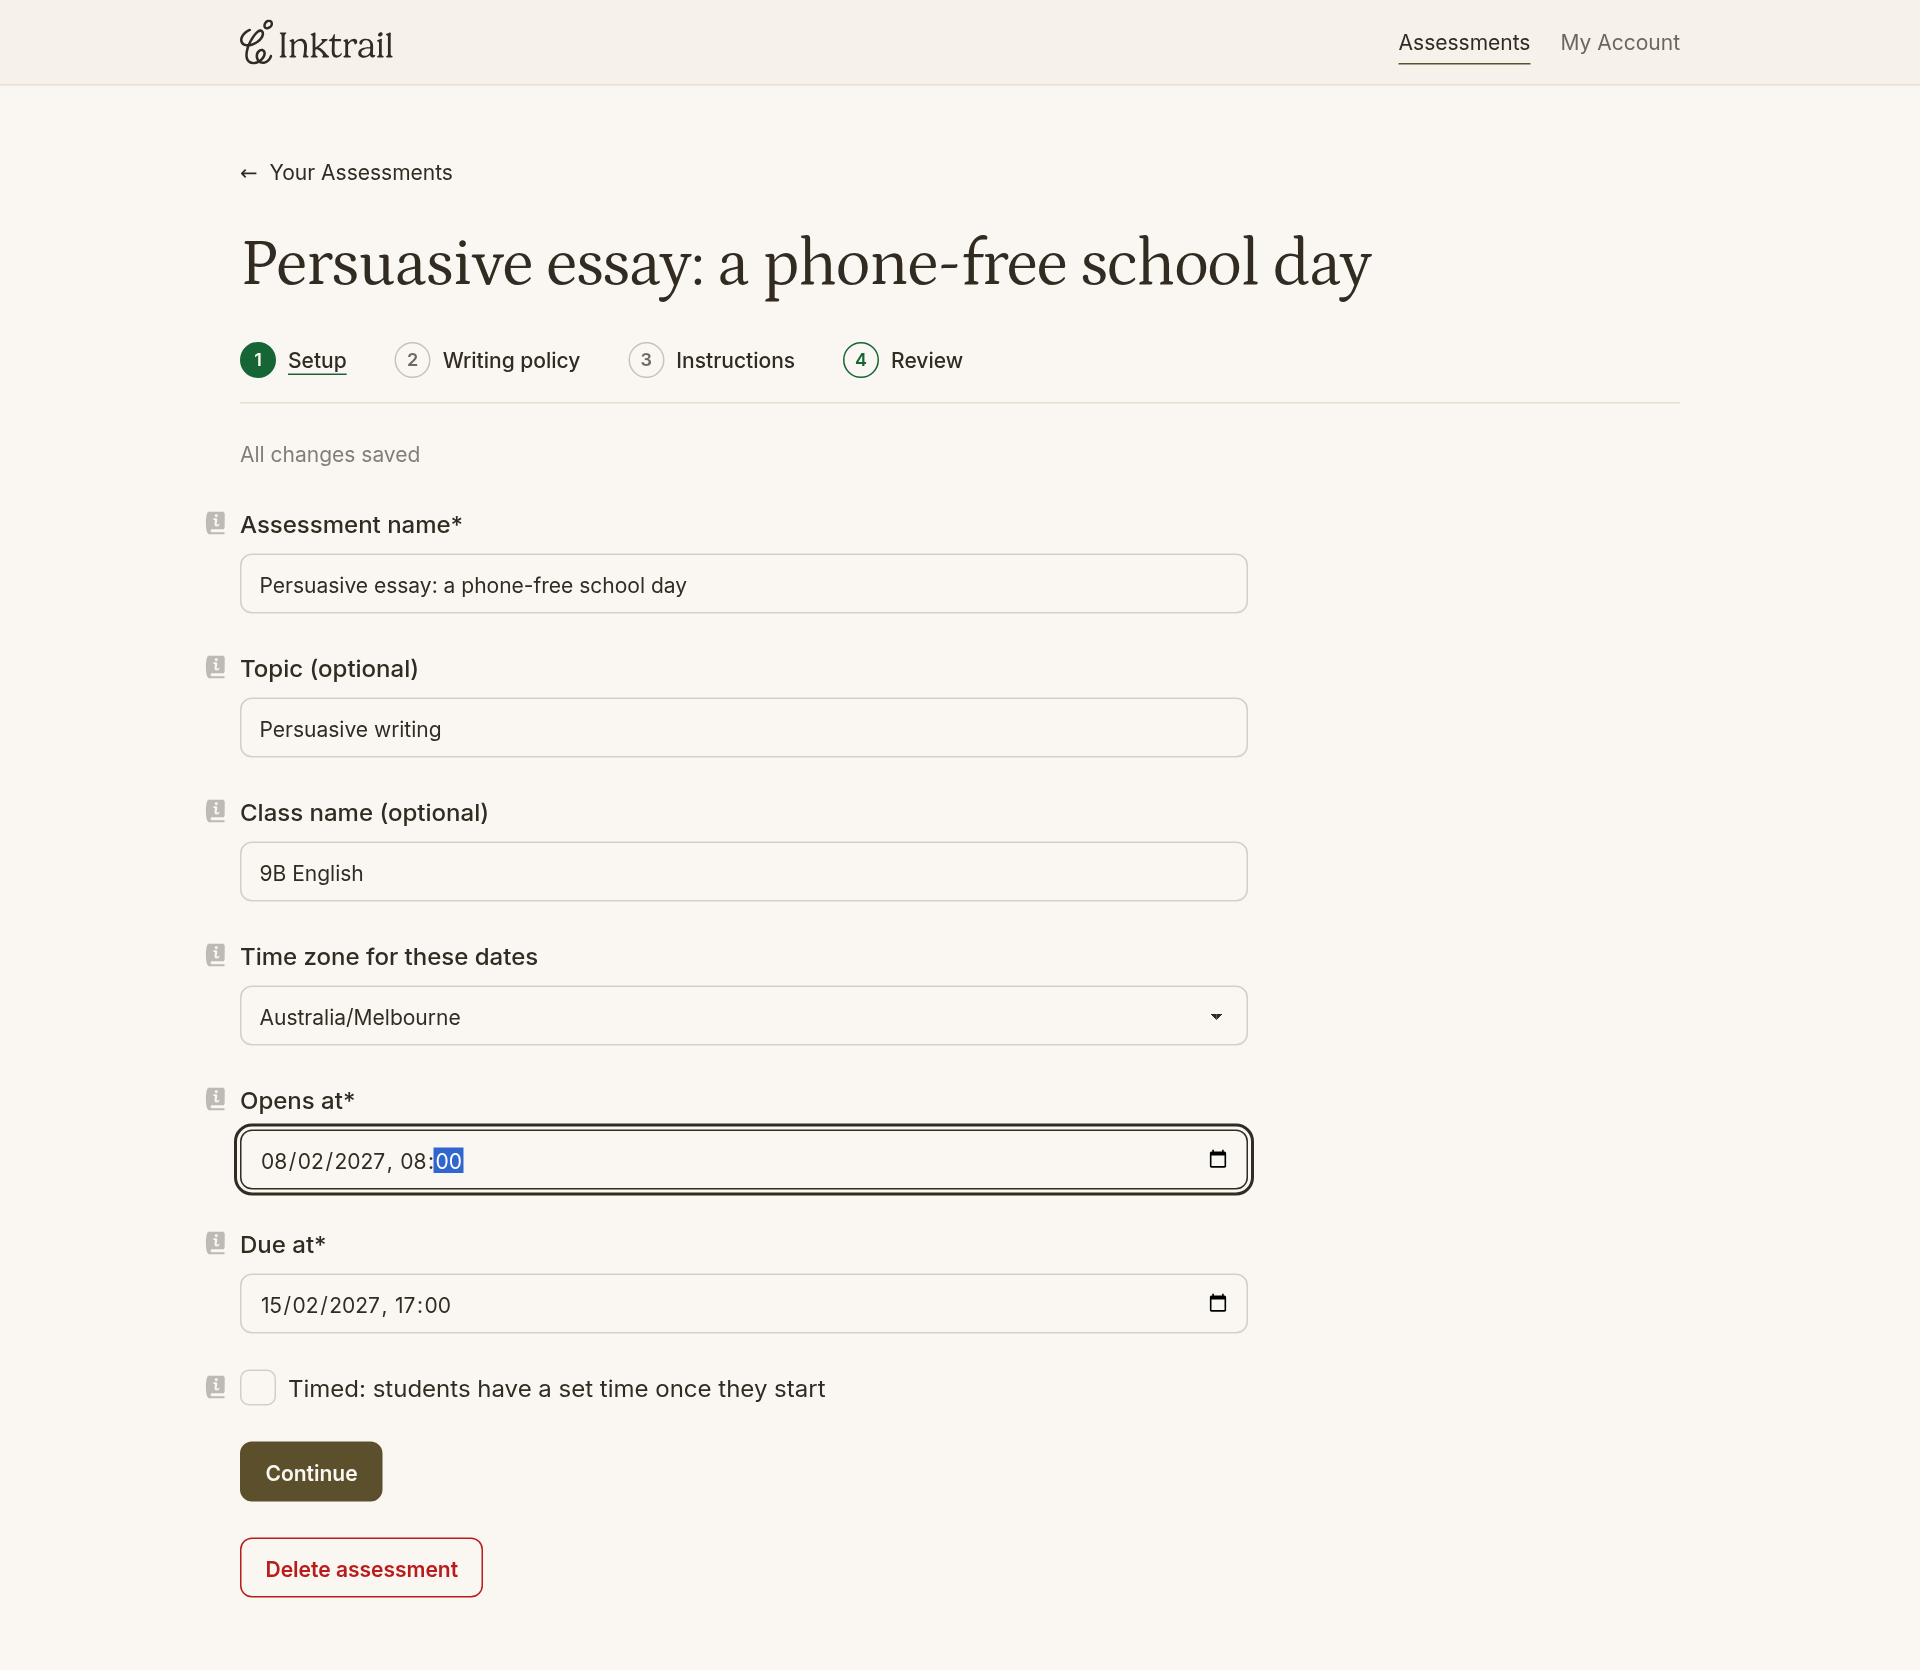
Set Opens at to when you want students to start. Students can't write before this time. Set Due at to your deadline, or leave the default of one week. Work submitted after the due time is marked late.
Inktrail fills Time zone for these dates from your browser. Change it only if it doesn't match the zone you want for these dates. Each date is a single moment for everyone: students in other time zones see it converted to their own.
To try the assessment straight away in step 9, choose an opening time that has already passed and a due date still ahead. For example, today at 8:00 am and a week later at 5:00 pm. Normally you would open it for the lesson when students start.
4. Set the word count
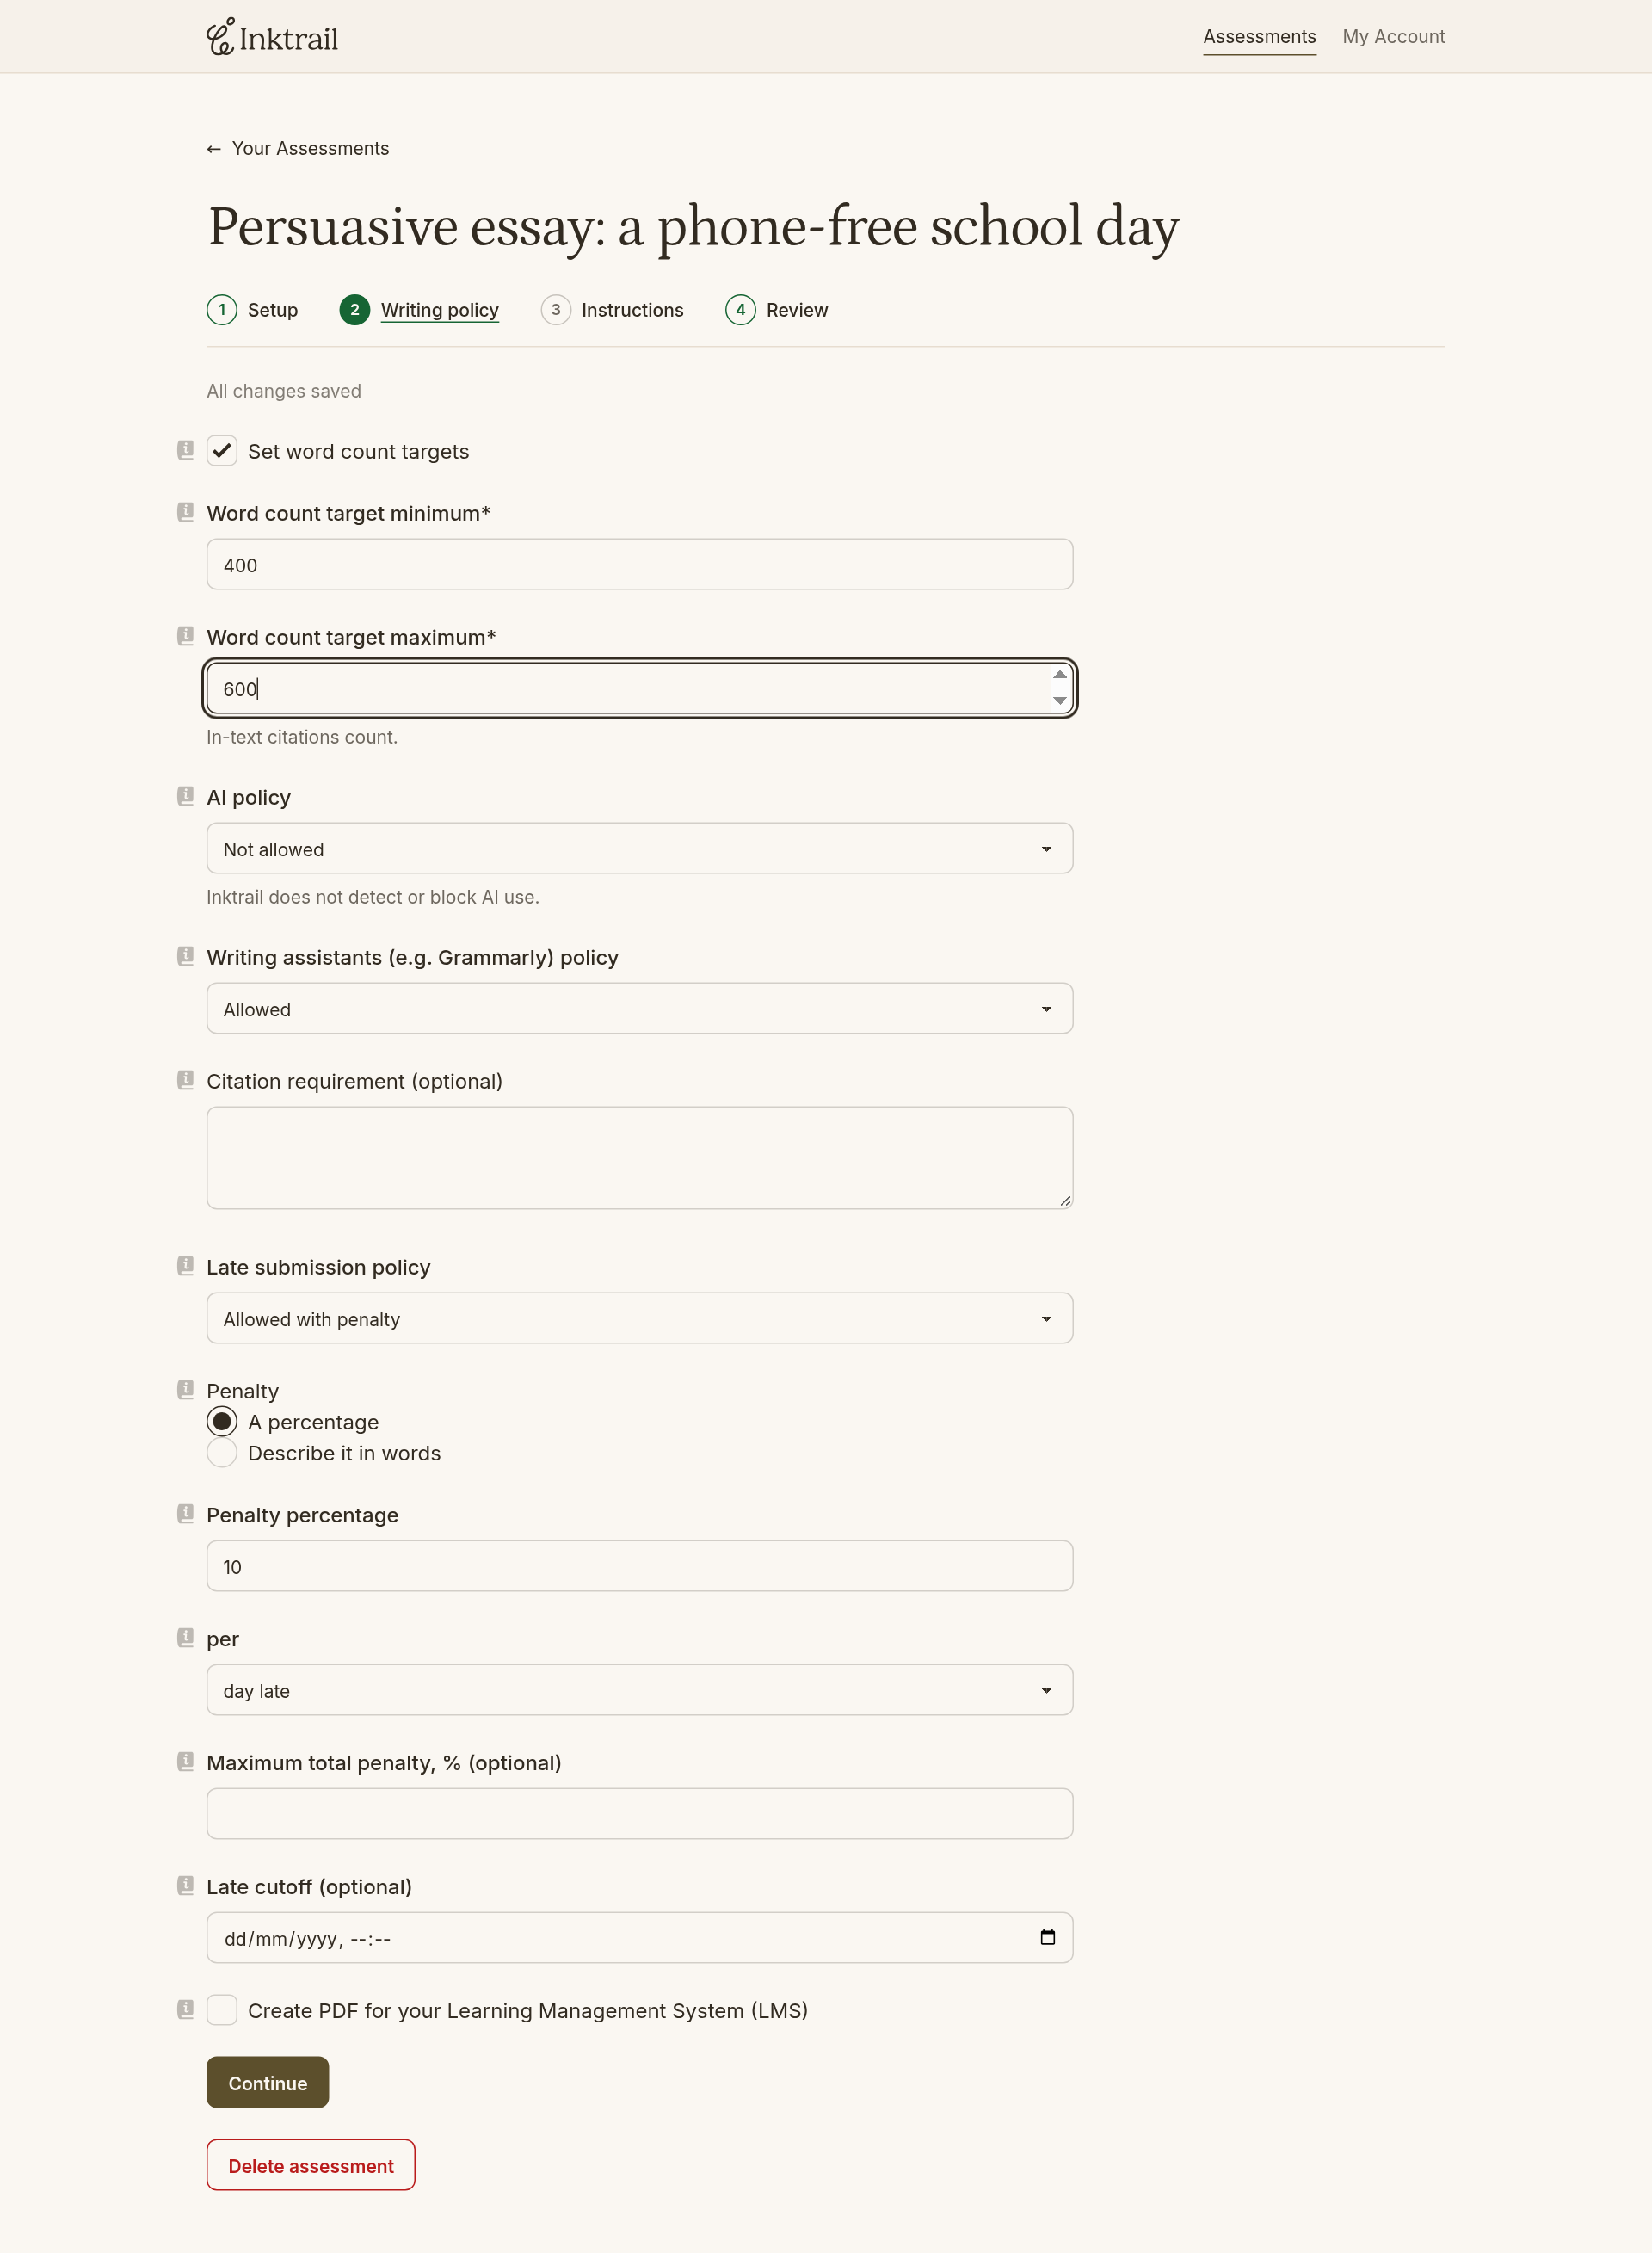
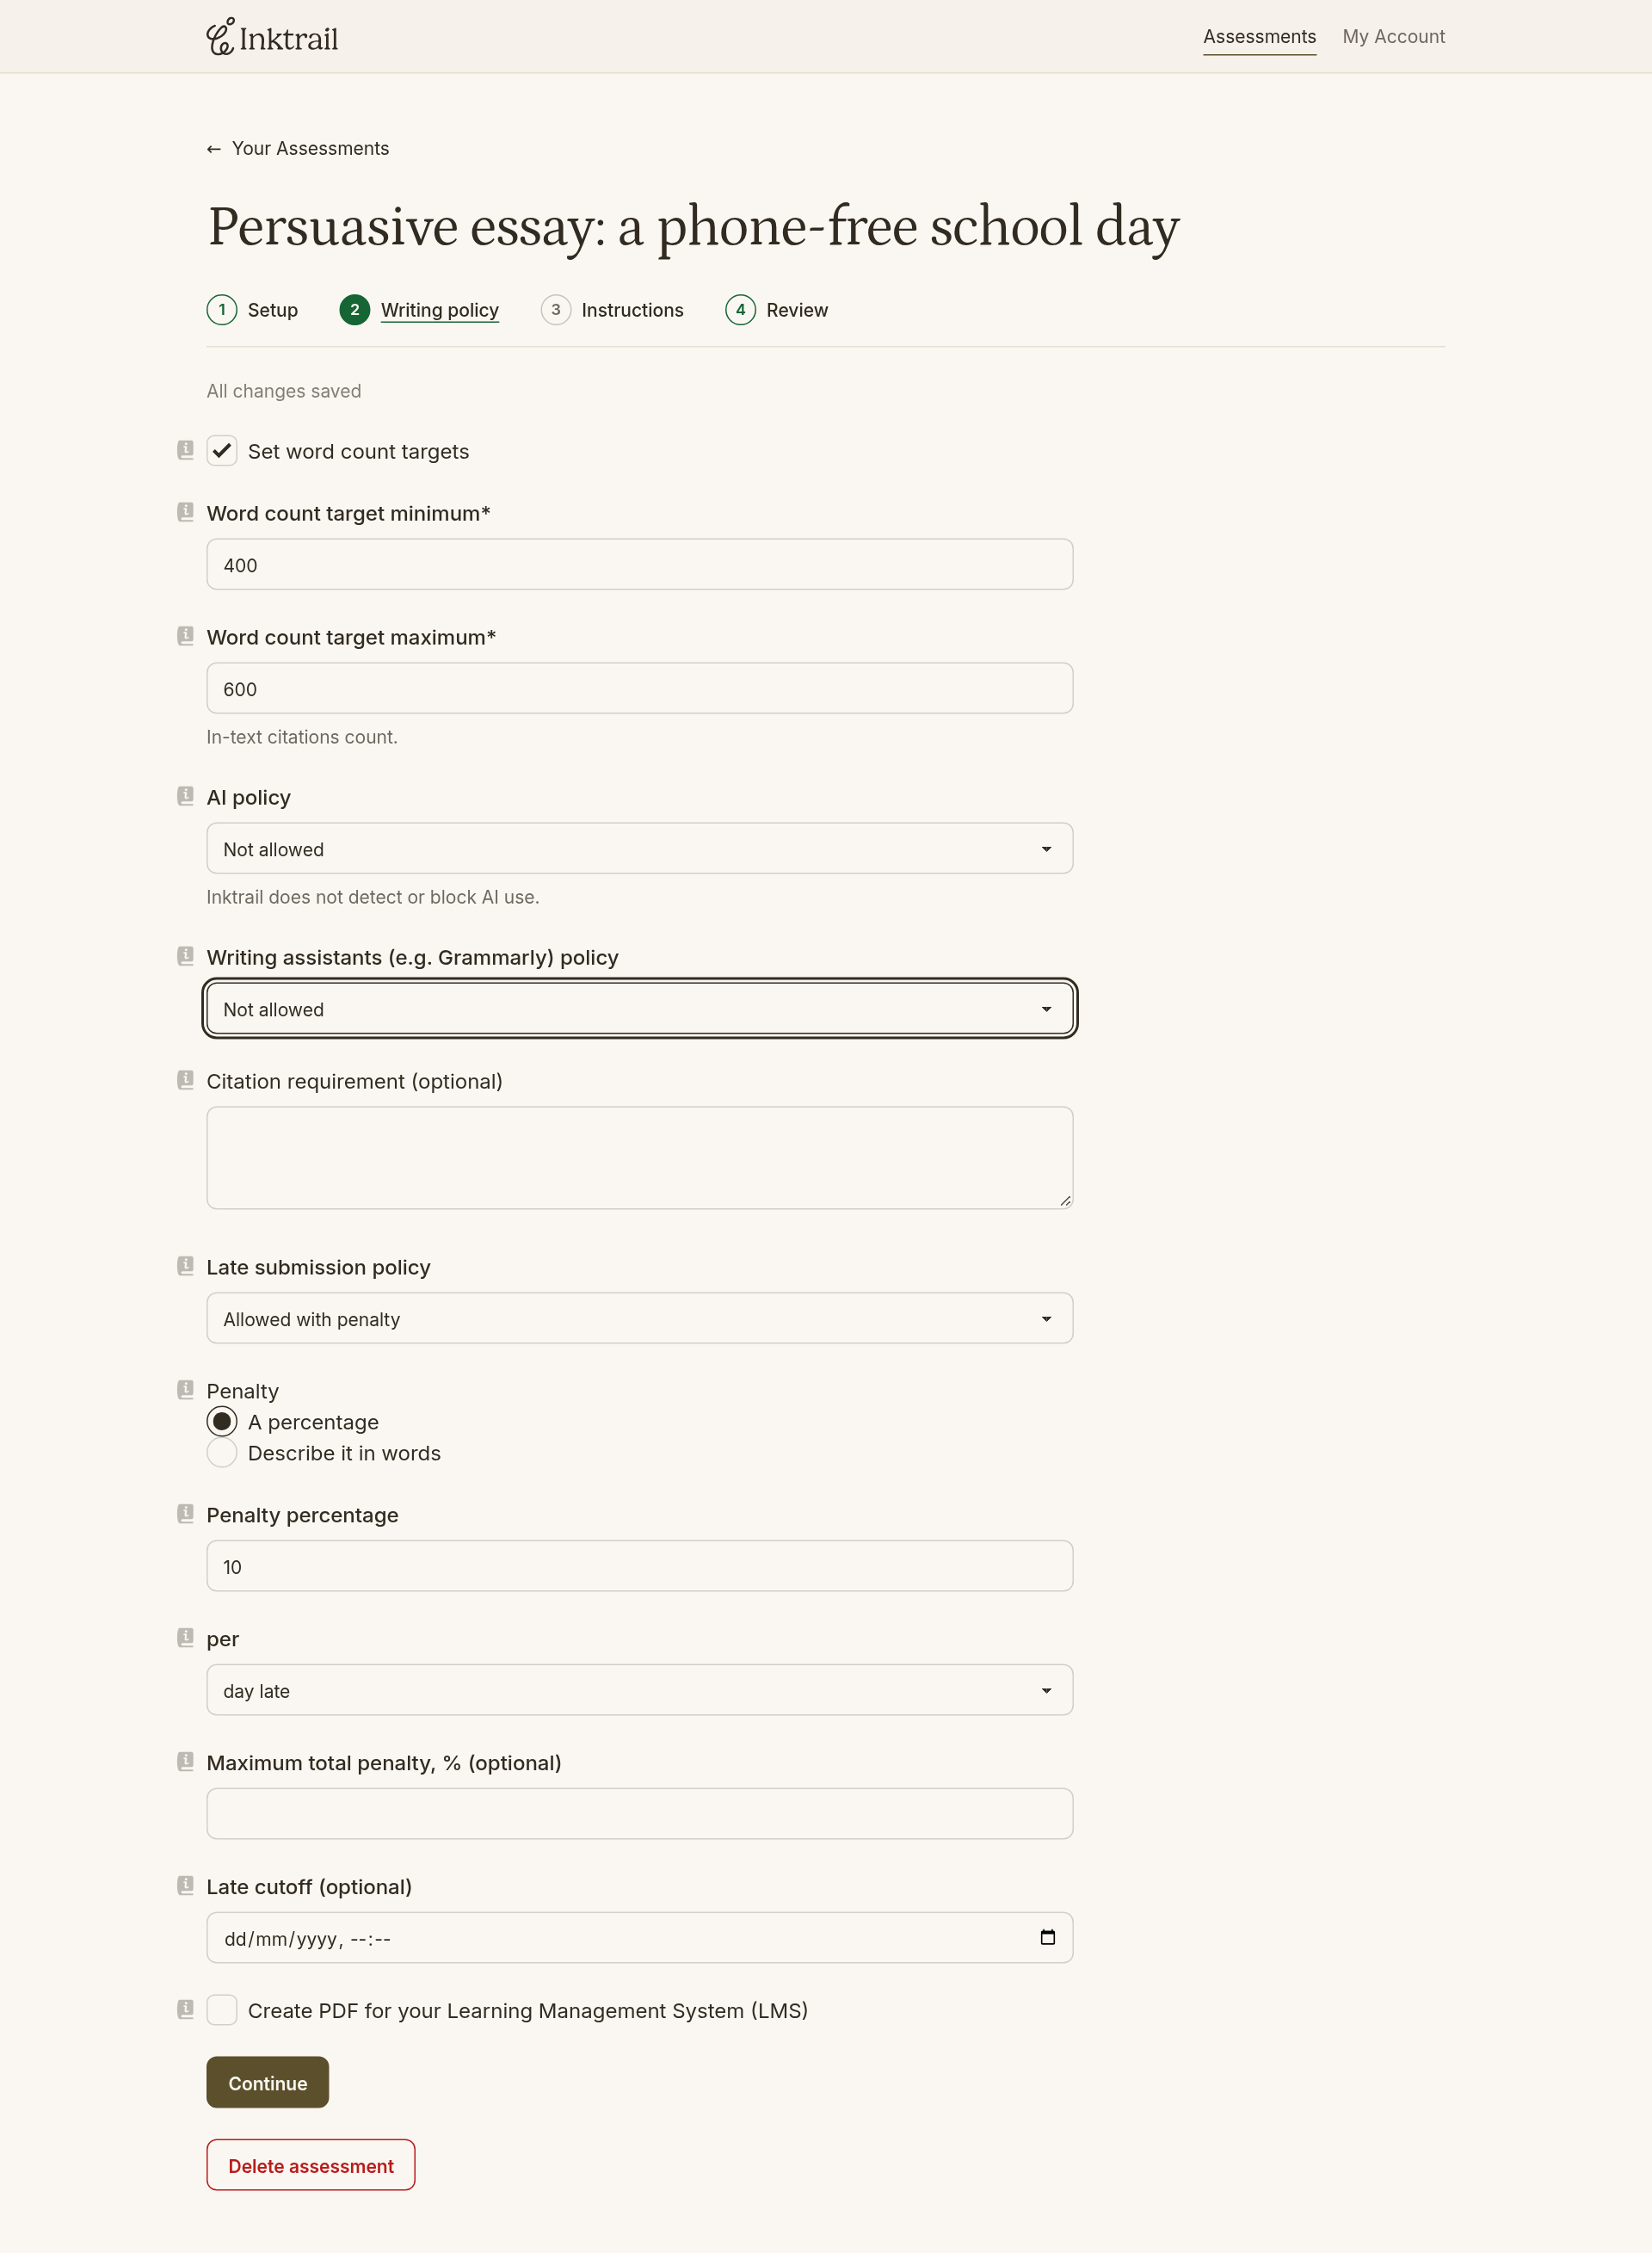
Select Continue to go to Writing policy. Set a target range using both Word count target minimum and Word count target maximum. For example, 400 to 600 gives students a range to aim for.
Students see their word count next to your target range while they write. The range is a guide: they can still submit work below or above it, and you see the length when you review it. In-text citations count as words; a reference list at the end does not.
5. Decide on writing assistants
Use Writing assistants (e.g. Grammarly) policy to decide whether students may use these tools. For example, Not allowed suits a task that assesses unaided writing accuracy.
Students see this policy next to the editor. When you choose Not allowed, Inktrail makes a best effort to block Grammarly and similar tools in the editor and turns off the browser's spell check. Some tools, or determined students, can still get around it. Choose Allowed when the task is about ideas rather than accuracy.
Two other choices on this step matter for most first assessments, and this example keeps their starting values:
- AI policy is Not allowed. Students see your rule on their work page and beside the editor. Inktrail tells students the rule; it doesn't detect or block AI use.
- Late submission policy is Allowed with penalty, 10% per day. Students can keep writing and submit after the due date, and you see how late the work was. Inktrail doesn't grade, so you apply the penalty yourself. Choose Not allowed to close writing at the due date.
Every setting has a Tell me more button beside its label that explains what students see. The article Assessment settings covers the rest, such as citation requirements and the LMS PDF.
6. Write the student instructions
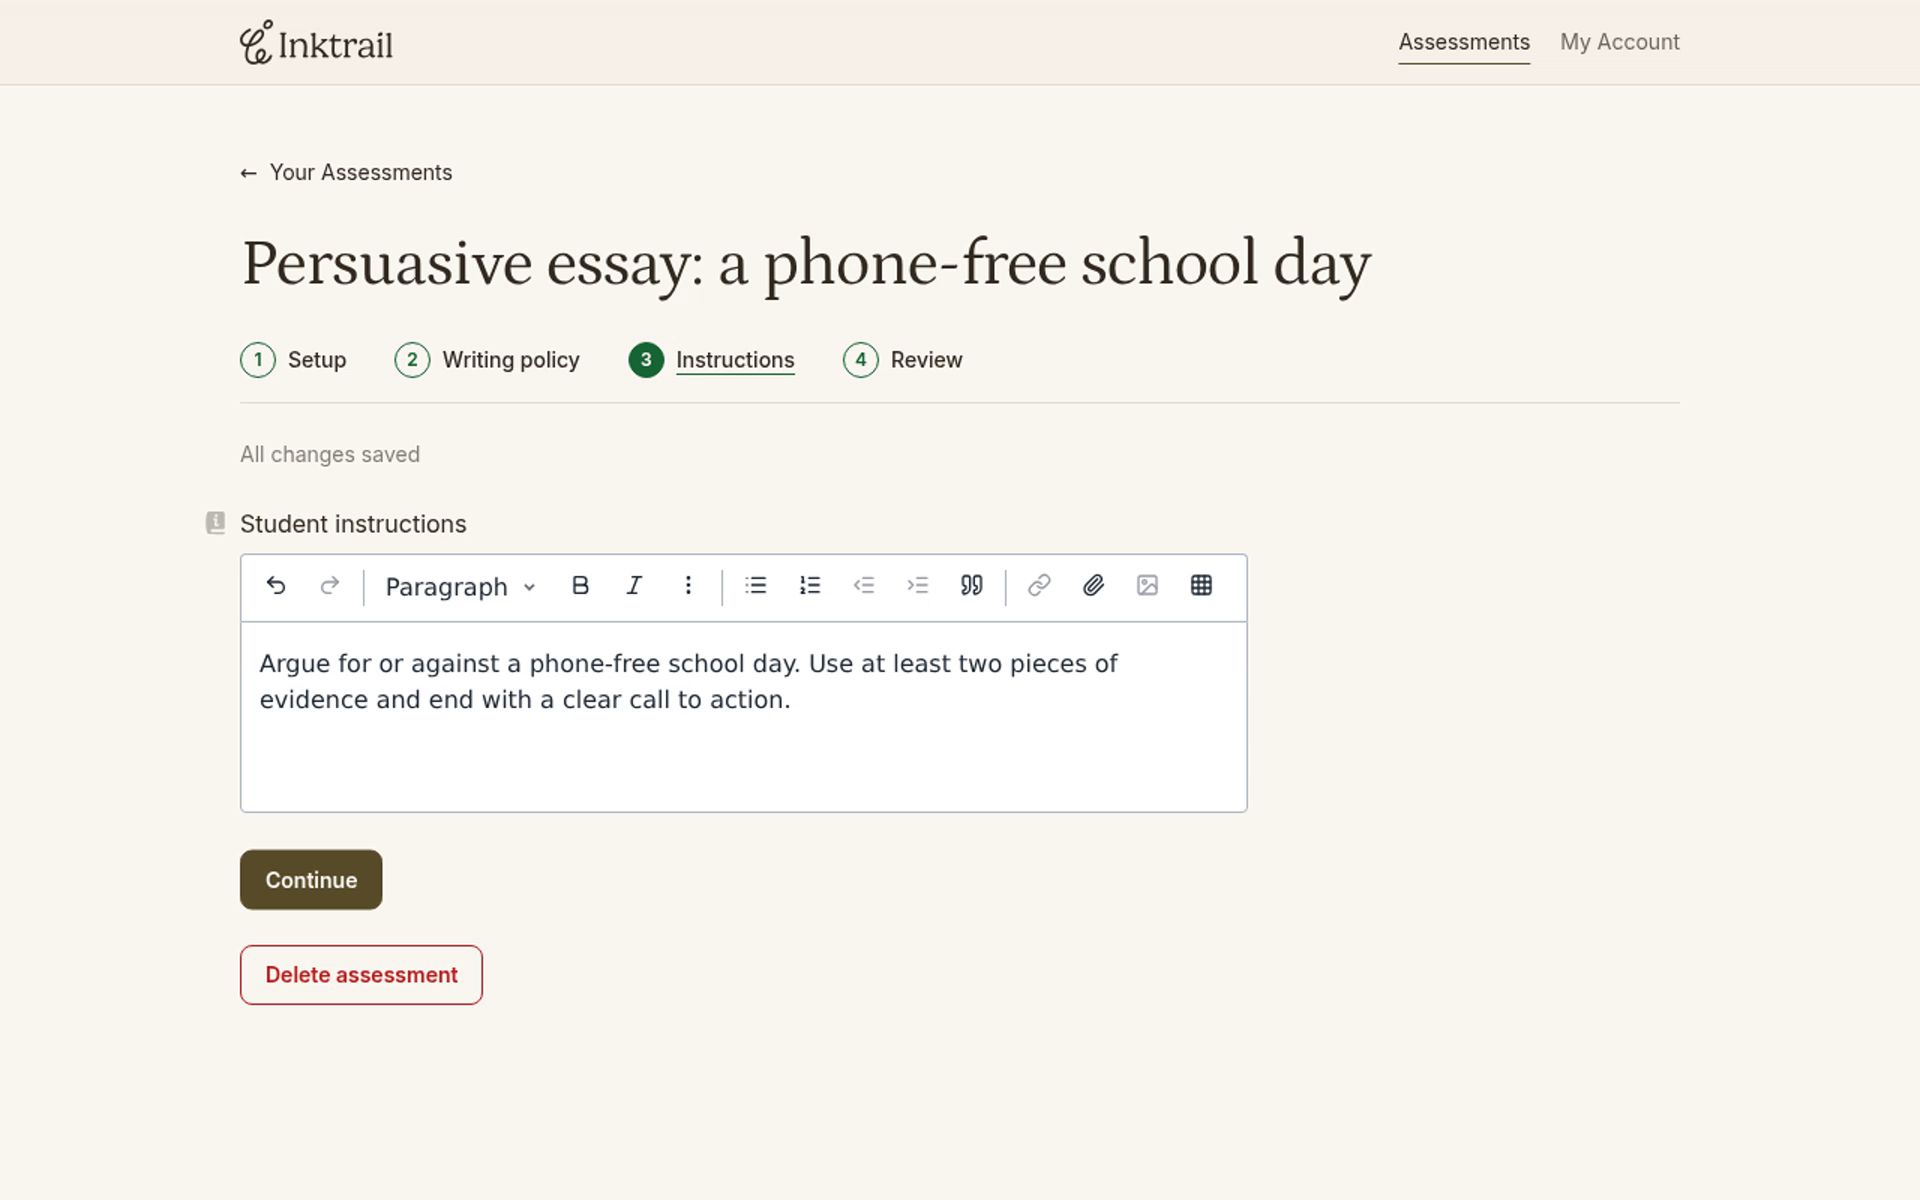
Select Continue to go to Instructions. In Student instructions, explain what students should do. For example:
Argue for or against a phone-free school day. Use at least two pieces of evidence and end with a clear call to action.
Students see these instructions in the editor while they write. You can format them with the toolbar, add lists and links, or attach an image or file.
7. Check the summary
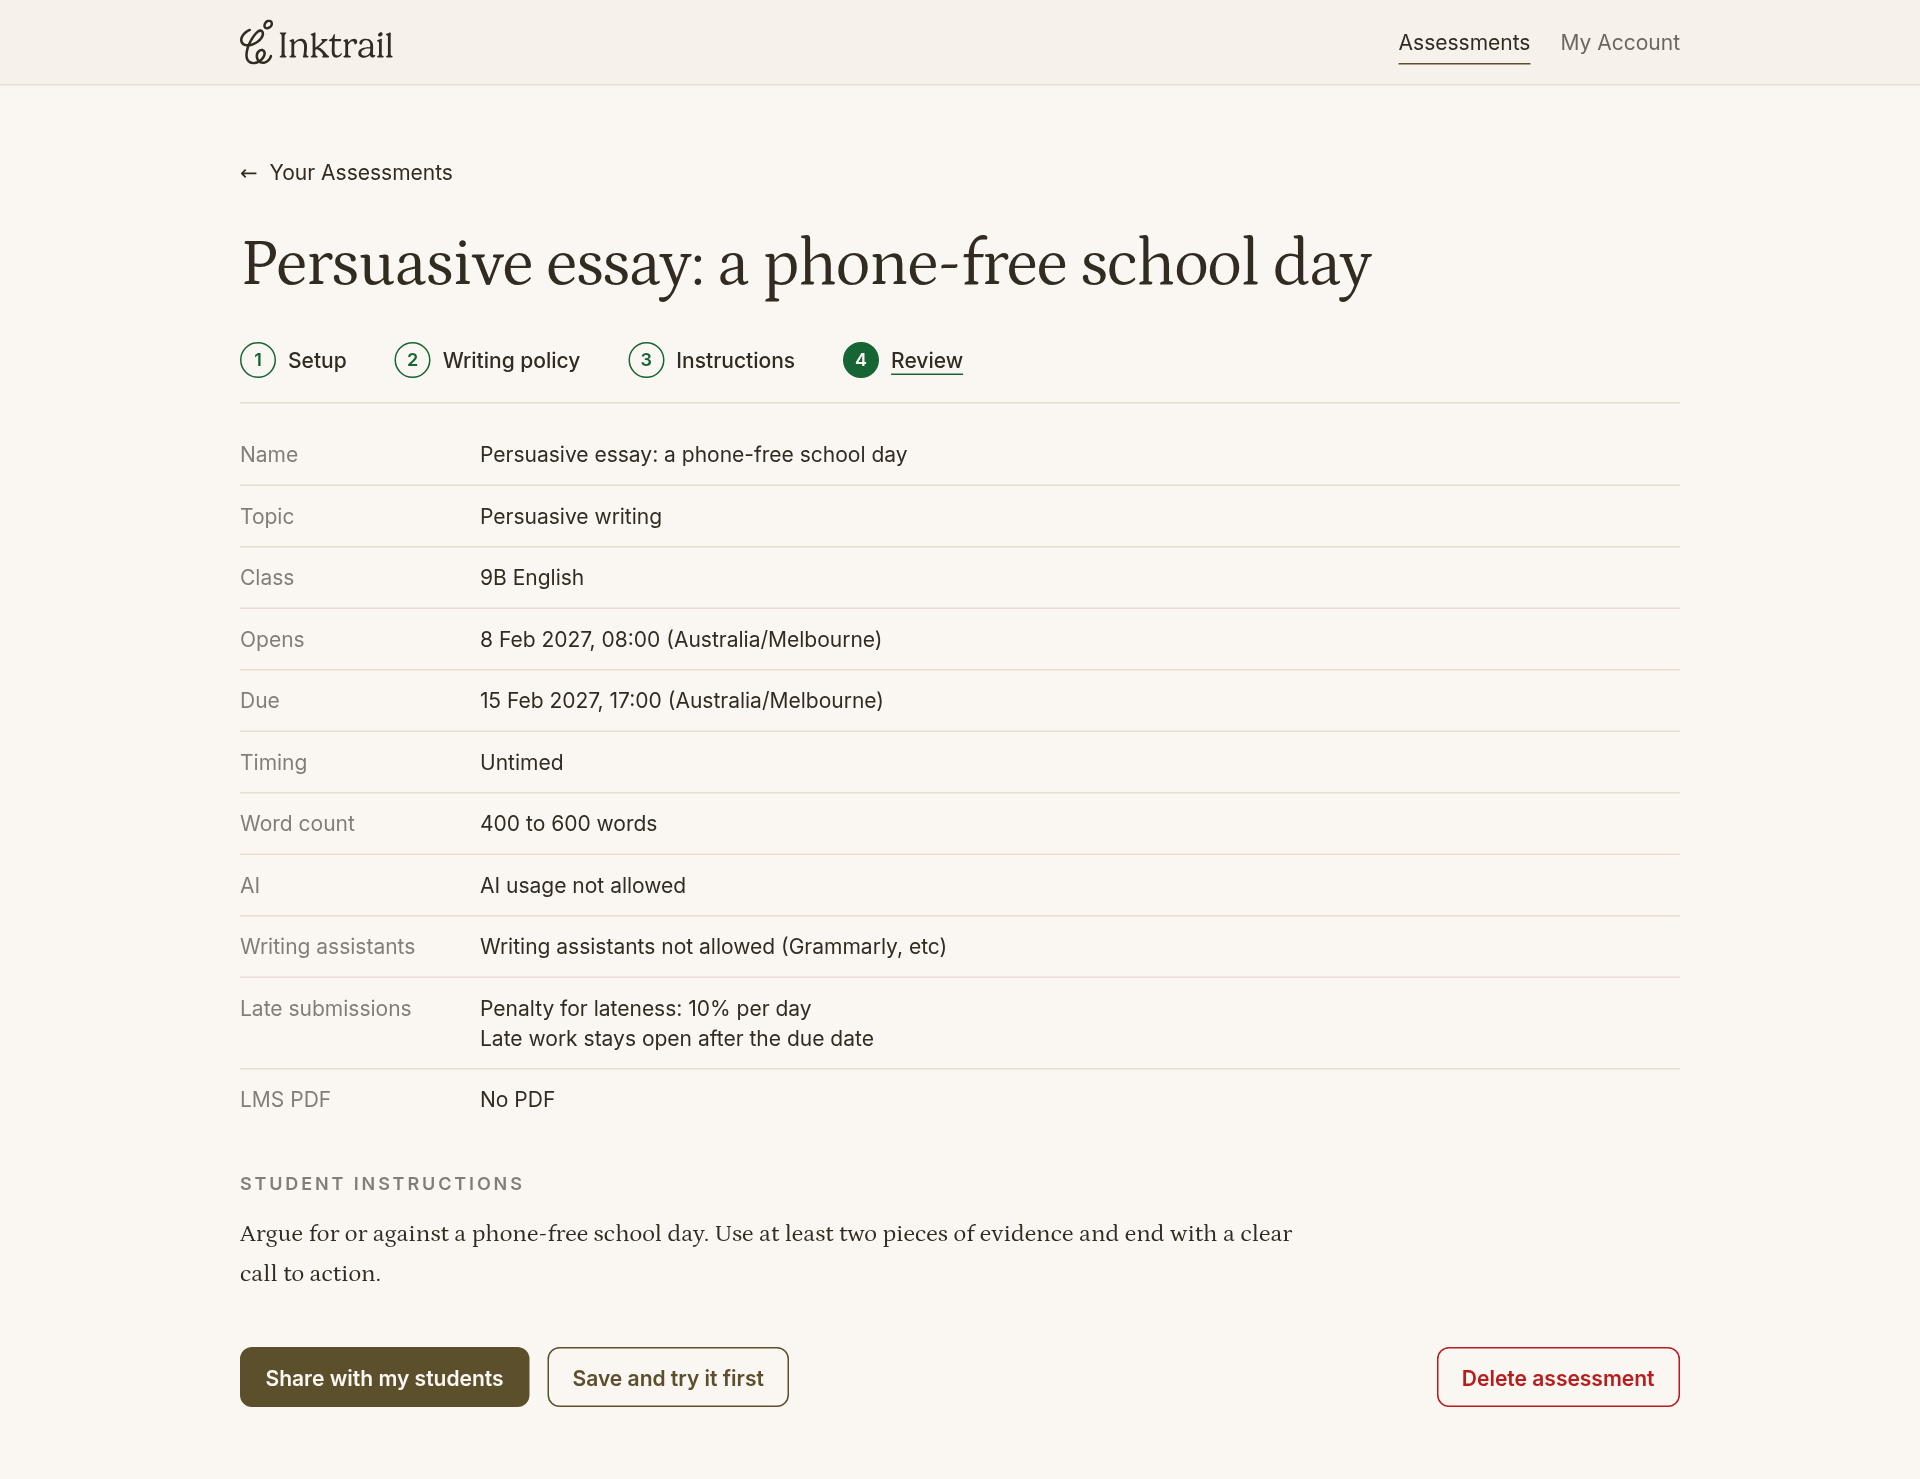
Select Continue to see Review. It shows every setting in one place: dates, timing, word count, policies and your instructions.
If something is missing or invalid, Review lists each problem with a link back to its step instead of the publish buttons.
8. Save it for testing
Select Save and try it first.
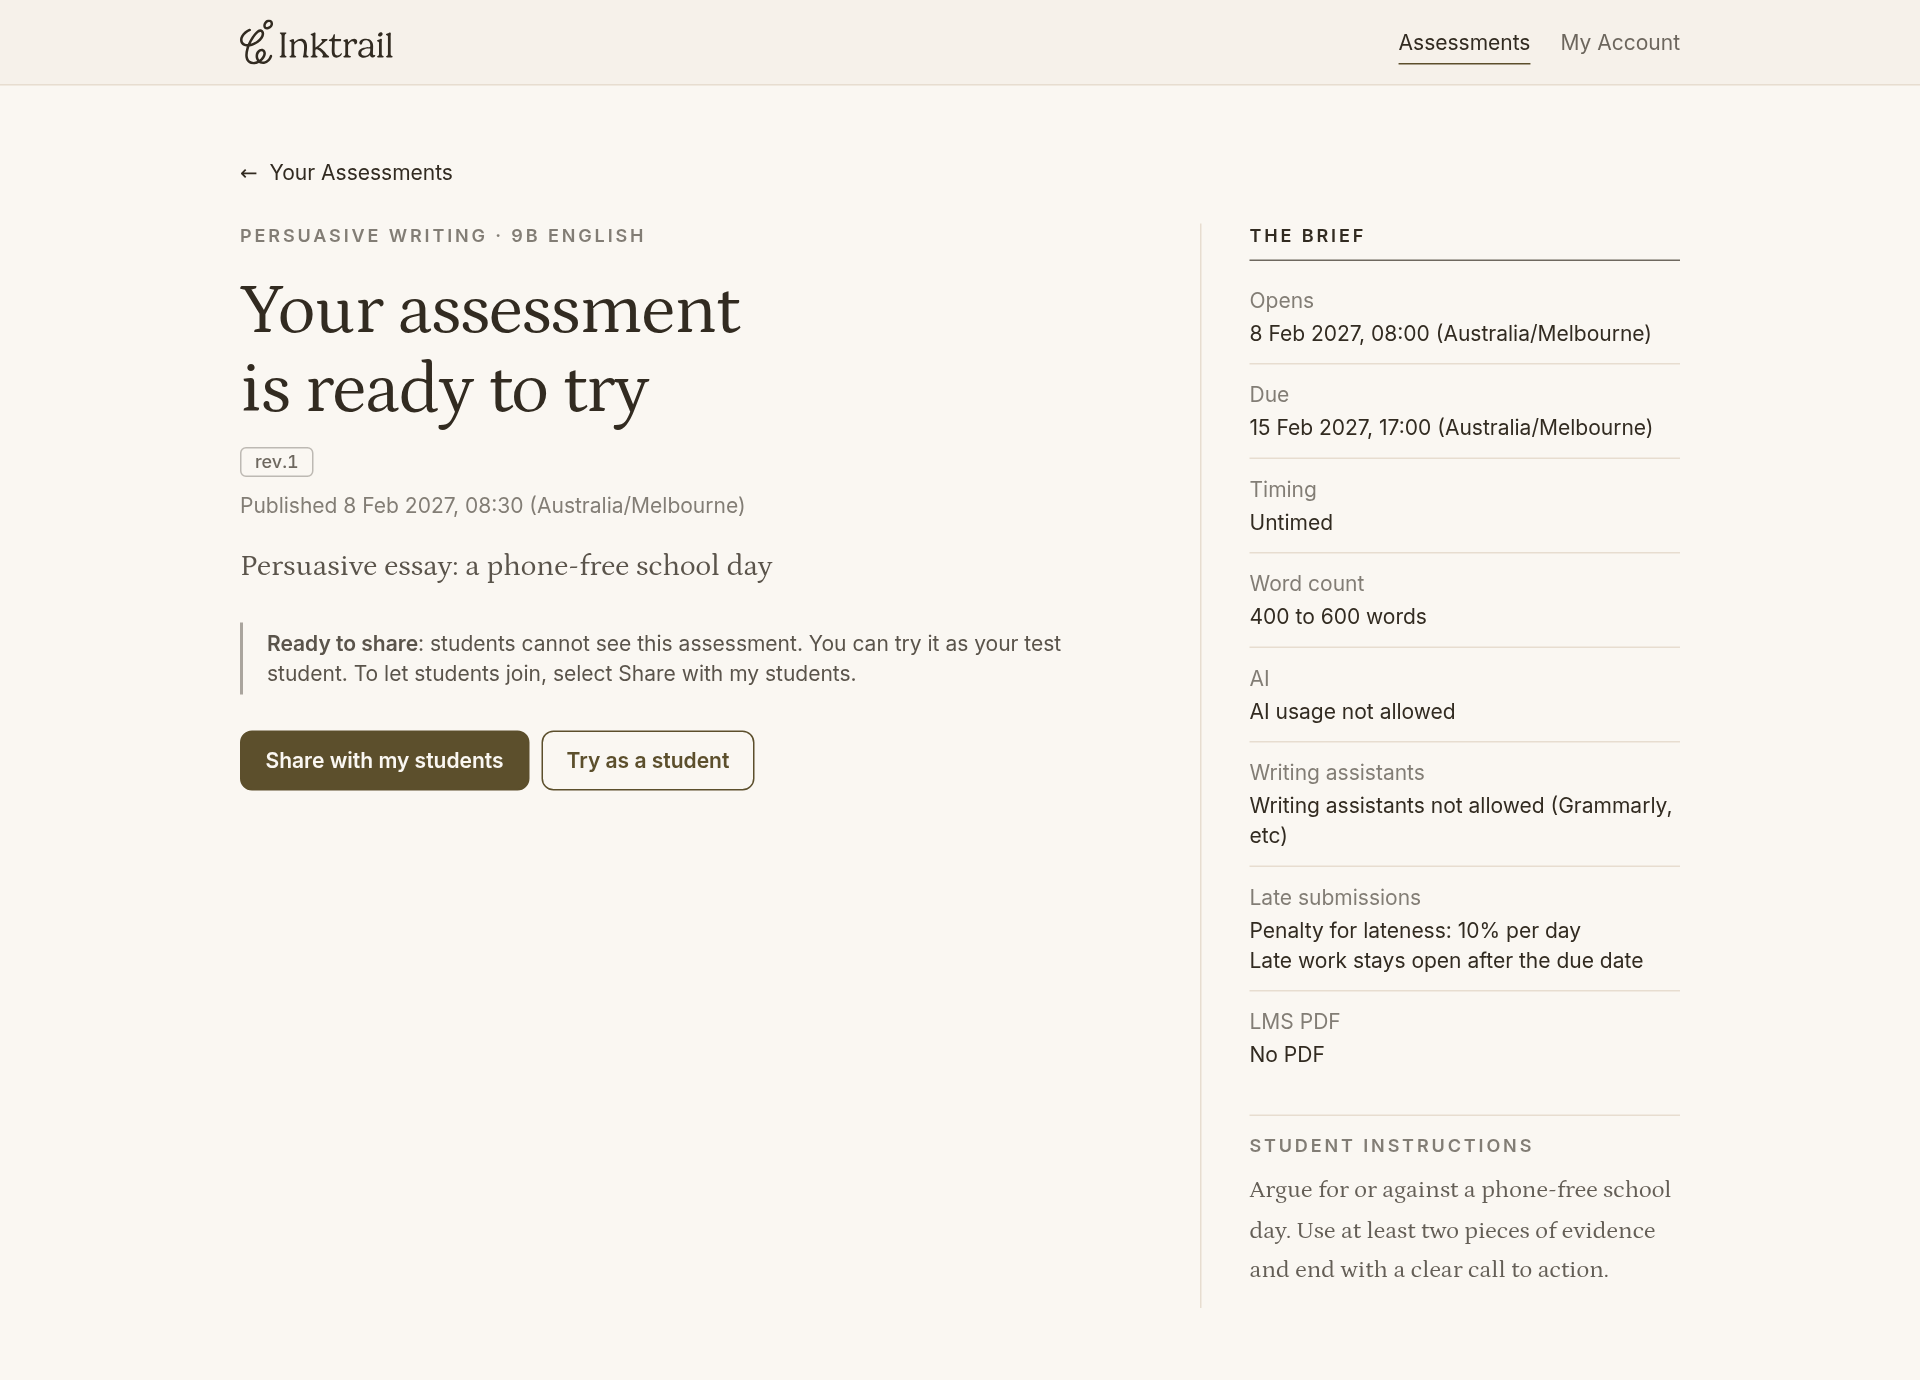
The page says Your assessment is ready to try, with the note Ready to share. Students cannot see or join it yet. Only you can open it, as your own test student.
9. Open it as your test student
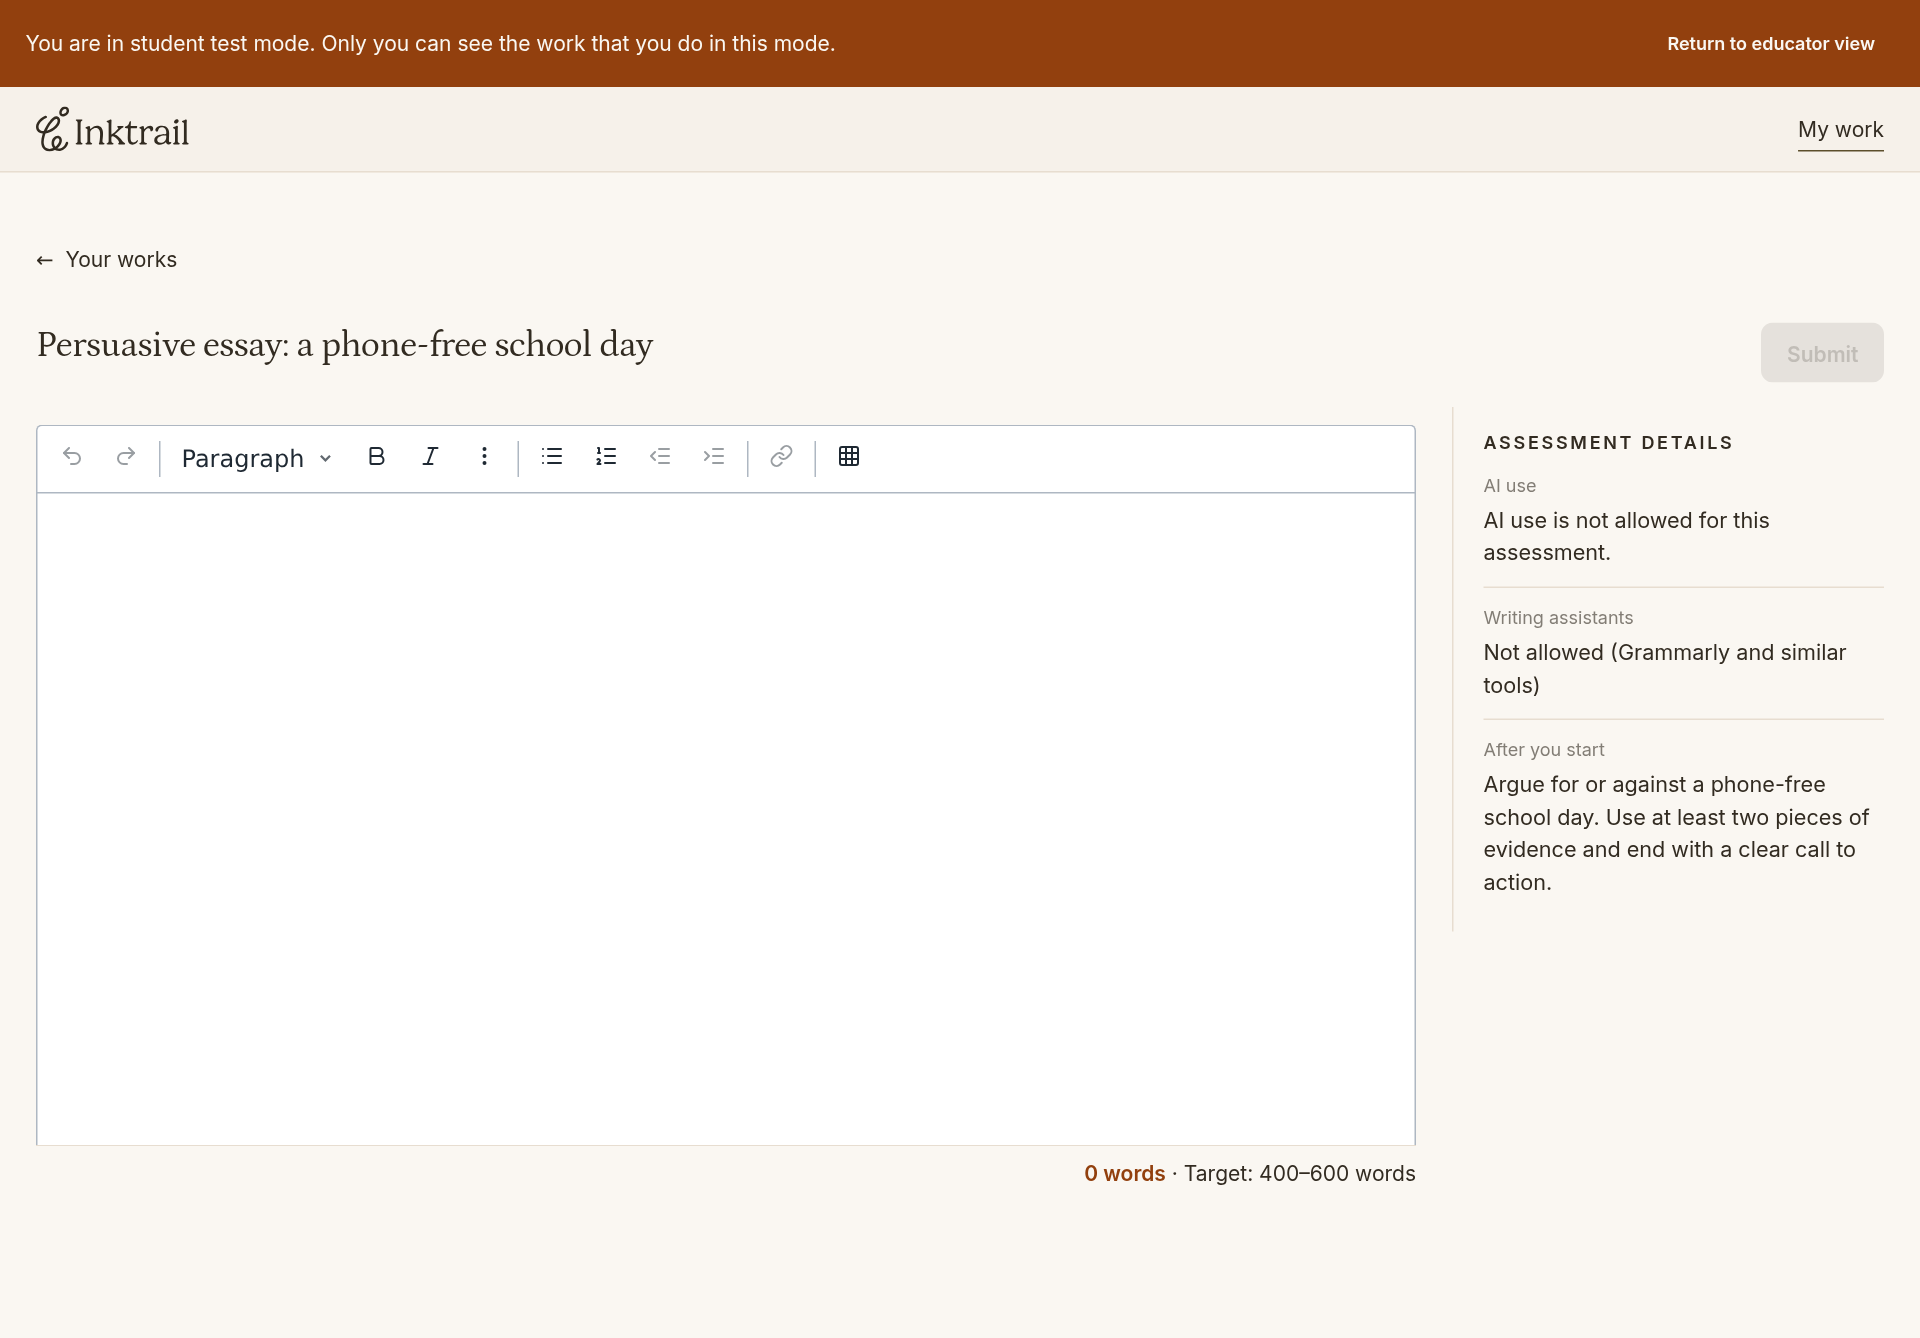
Select Try as a student. An orange banner tells you that you are in student test mode, and that only you can see the work you do here. Select Get assessment, then Start writing.
You now see exactly what a student sees: the editor, your instructions, the word count against your targets and your policies beside the page.
10. Write and submit a test answer
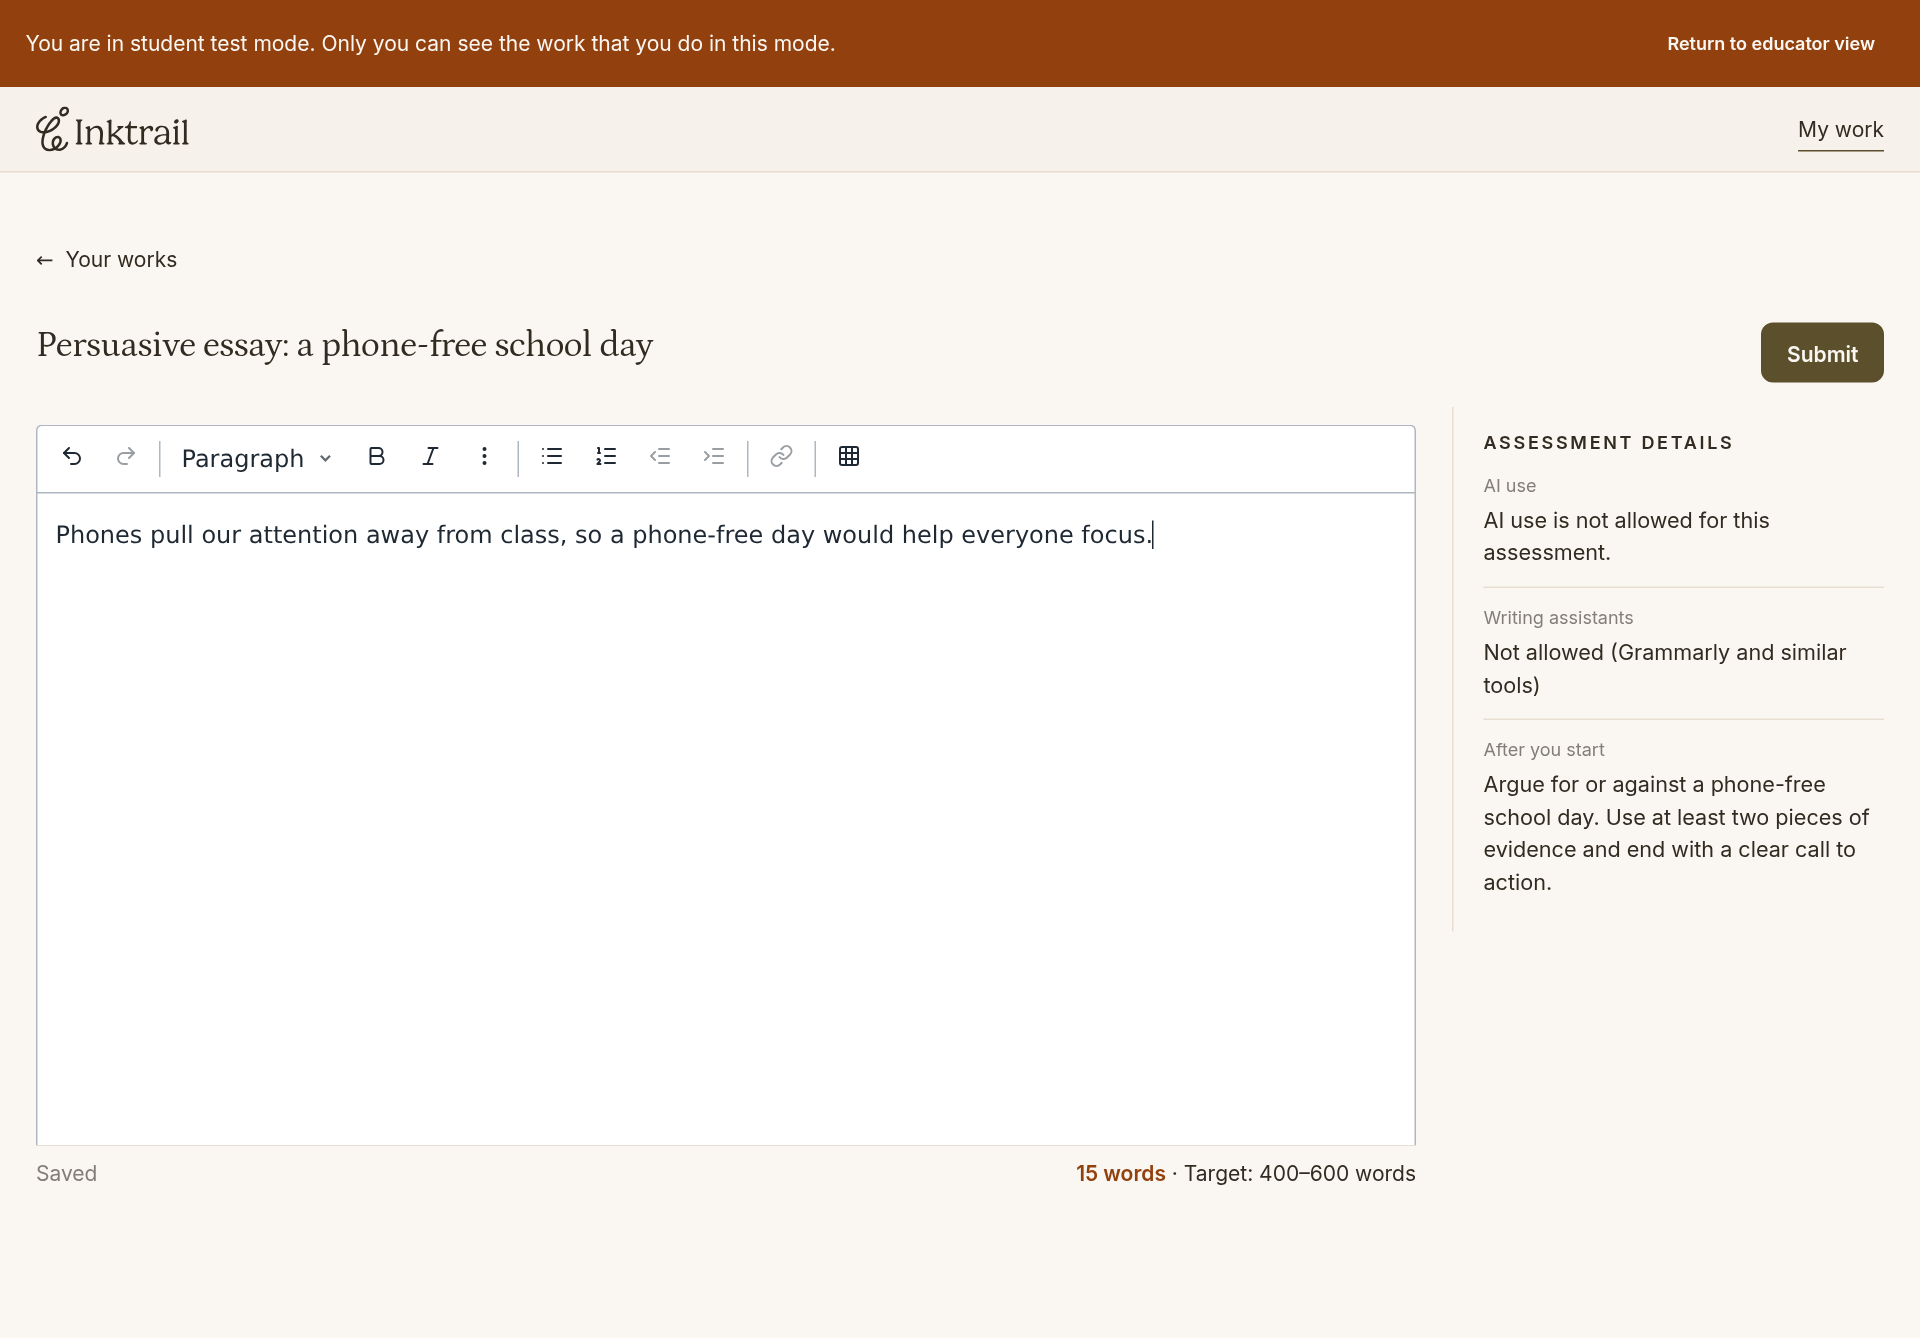
Write your own test answer to see how it comes through. Once it shows Saved, select Submit and confirm in the dialog. The submission page shows your test work as submitted.
11. Go back to your educator view
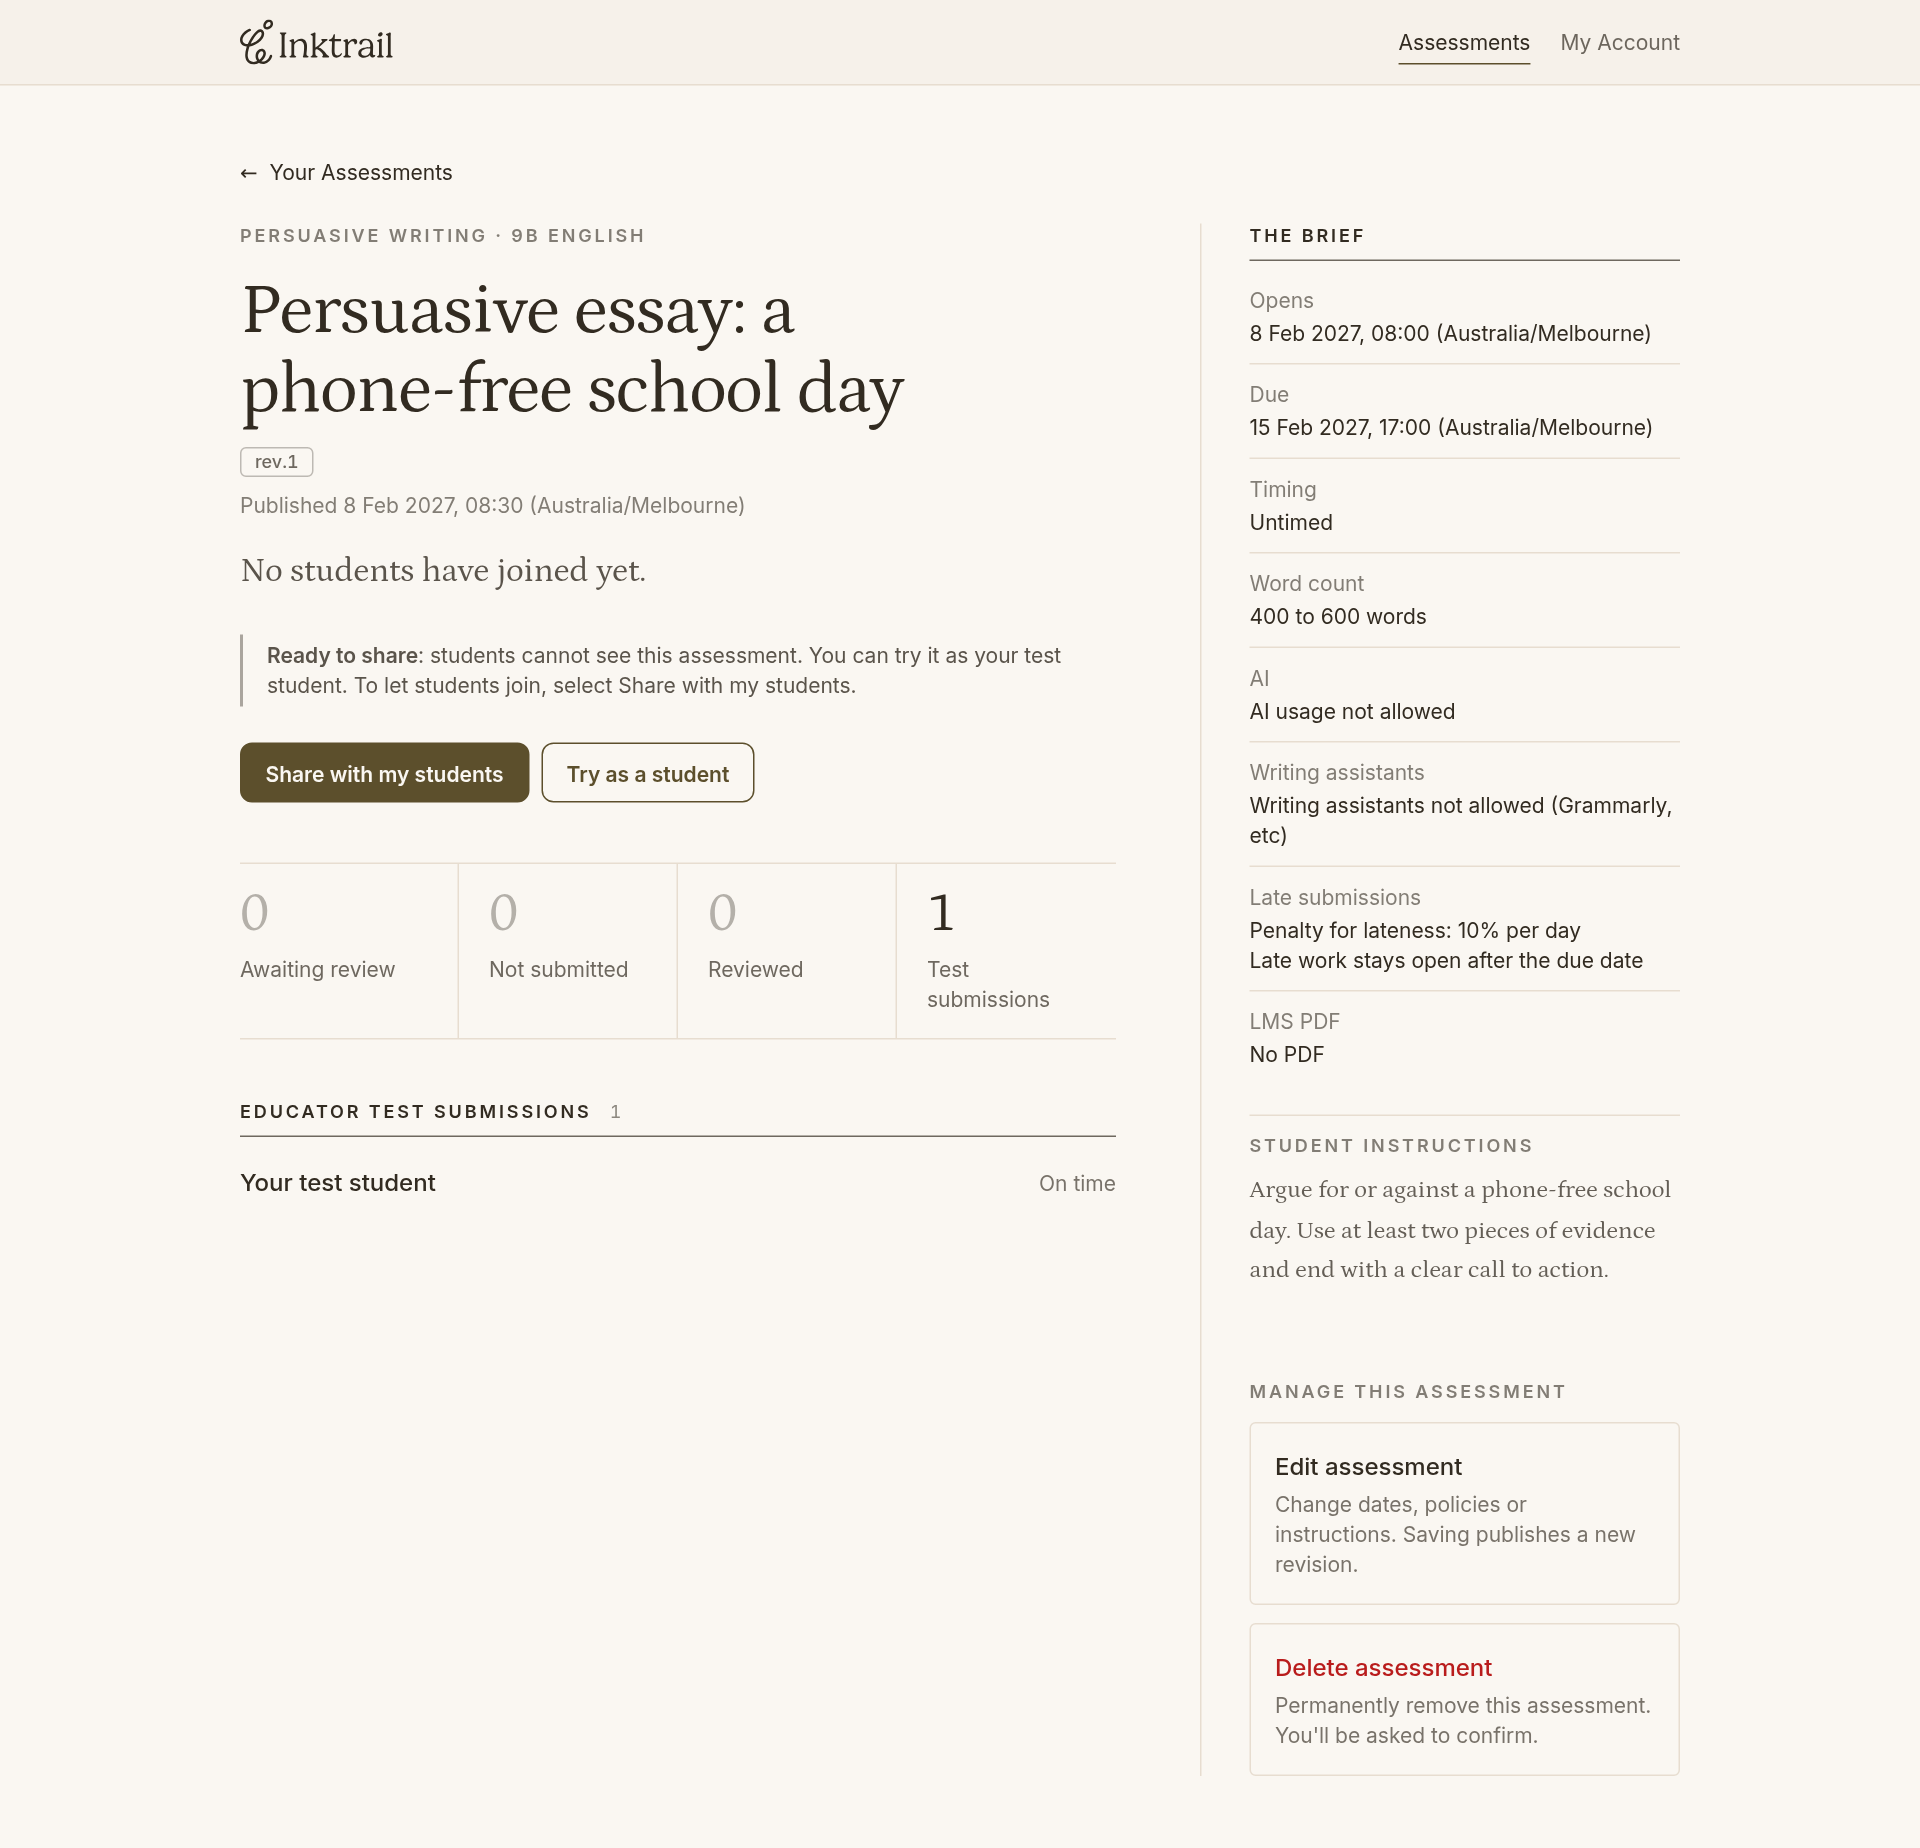
Select Return to educator view in the banner. You are back on the assessment's page, and your test answer is listed under Educator test submissions as Your test student. Test submissions never mix with your students' work.
What you can do now
You have set up an assessment and tested it as your students will see it. To change anything you noticed while testing, use Edit assessment on the assessment's page. When it looks right, give it to your class with Share with my students. The article Share an assessment with your class shows you how, and what your students receive.